


Homemade Dairy Queen Ice Cream Cake Recipe: A Delicious Frozen Delight!
Description: Recreate the magic of DQ Ice Cream Cake Recipe at home with our easy-to-follow recipe. Perfect for birthdays, celebrations, or simply indulging your swe
et tooth, this homemade version captures all the creamy goodness of the original.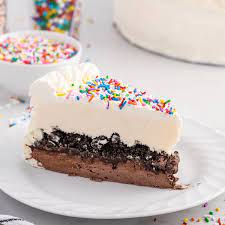
Few treats evoke the nostalgia and delight of Dairy Queen’s signature ice cream cake. Layers of creamy ice cream, fudge, and chocolate crunchies come together to create a dessert that’s as delicious as it is iconic.
Now, you can enjoy the same irresistible flavors at home with our homemade DQ Ice Cream Cake Recipe . With just a few simple ingredients and a bit of freezer time, you’ll be savoring every creamy bite in no time!
DQ Ice Cream Cake Recipe Ingredients:
For the Cake:
- 1 quart (4 cups) vanilla ice cream, softened
- 1 quart (4 cups) chocolate ice cream, softened
- 1 package of chocolate sandwich cookies (such as Oreos), crushed
For the Fudge Layer:
- 1 cup chocolate chips
- 1/2 cup heavy cream
For Decoration:
- Whipped cream
- Maraschino cherries
- Chocolate sauce
- Rainbow sprinkles
DQ Ice Cream Cake Recipe Instructions:
1. Prepare the Fudge Layer:
- In a small saucepan, heat the chocolate chips and heavy cream over low heat, stirring constantly, until the chocolate is melted and the mixture is smooth. Remove from heat and let it cool slightly.
2. Assemble the Cake:
- Line a round cake pan with plastic wrap, leaving some overhang for easy removal later.
- Spread a layer of softened vanilla ice cream into the bottom of the cake pan, smoothing it out with a spatula.
- Drizzle half of the fudge sauce over the vanilla ice cream layer, then sprinkle with crushed chocolate sandwich cookies.
- Add a layer of softened chocolate ice cream on top of the cookies, followed by the remaining fudge sauce and more crushed cookies.
- Cover the cake with plastic wrap and freeze for at least 4 hours, or until completely set.
3. Decorate the Cake:
- Once the cake is set, remove it from the freezer and carefully invert it onto a serving platter.
- Remove the plastic wrap and cover the cake with whipped cream, spreading it evenly over the top and sides.
- Drizzle chocolate sauce over the whipped cream and decorate with maraschino cherries and rainbow sprinkles as desired.
4. Serve and Enjoy:
- Slice the Dairy Queen ice cream cake with a sharp knife and serve immediately. Enjoy the creamy, chocolaty goodness with friends and family!
Tips for DQ Ice Cream Cake Recipe :
- Softening Ice Cream: Make sure to let the ice cream soften slightly at room temperature before assembling the cake. This will make it easier to spread and layer.
- Customize Your Cake: Feel free to get creative with the flavors and toppings! Experiment with different ice cream flavors, cookie mix-ins, and decorative touches to make your cake uniquely yours.
- Make Ahead: You can prepare the cake in advance and store it in the freezer until ready to serve. Just be sure to cover it tightly with plastic wrap to prevent freezer burn.
Conclusion: With its luscious layers of ice cream, fudge, and chocolate crunchies, homemade DQ Ice Cream Cake is a show-stopping dessert that’s perfect for any occasion. Whether you’re celebrating a birthday, hosting a party, or just craving a sweet treat, this recipe is sure to satisfy. So gather your ingredients, roll up your sleeves, and get ready to enjoy a slice of frozen bliss with our delicious homemade Dairy Queen ice cream cake!


